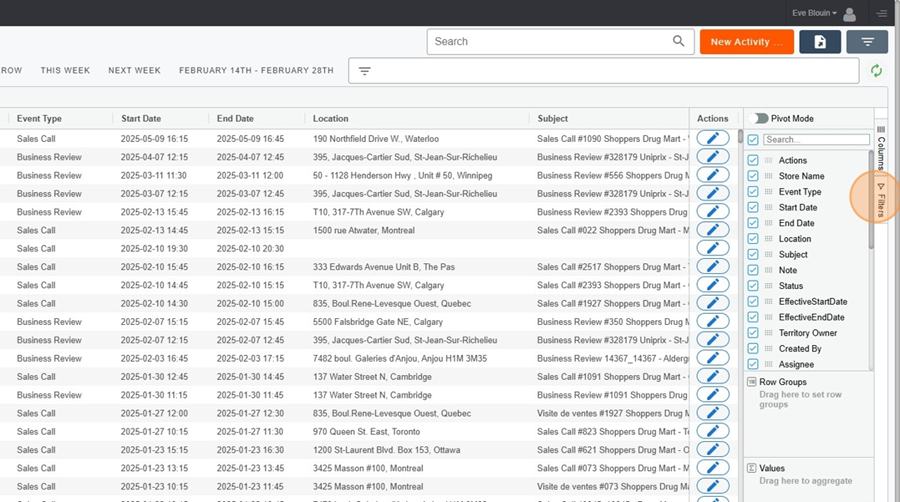
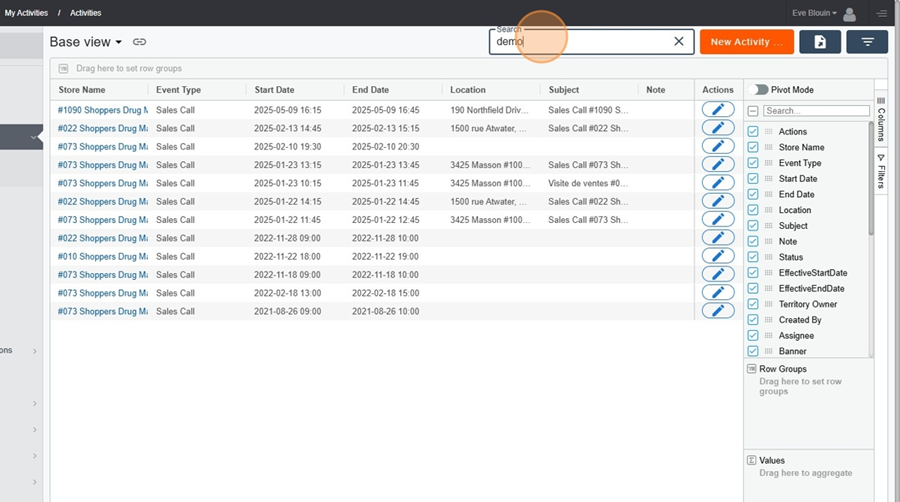
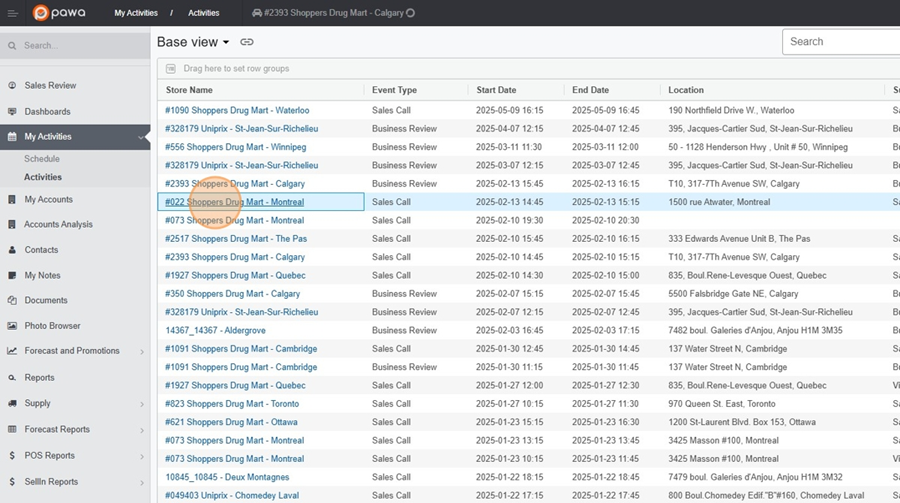
The activity screen contains the same content as what is found in the calendar. However, the information is displayed here in a list format.
It is convenient to use this screen when several events are planned on the same day, for example.
To configure the view (e.g., to show, hide, or move columns), you can also refer to the Page Configure a view in Pawa
Configure a view in Pawa
This page explains the view configuration options in Pawa
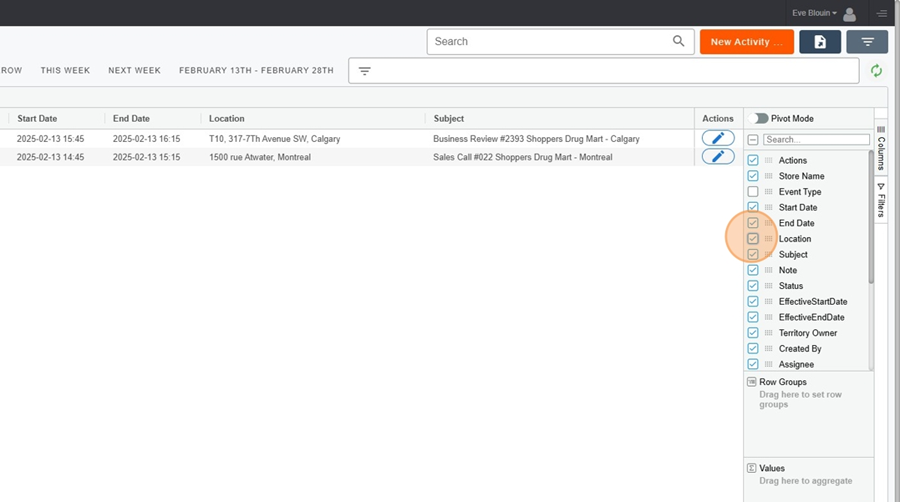
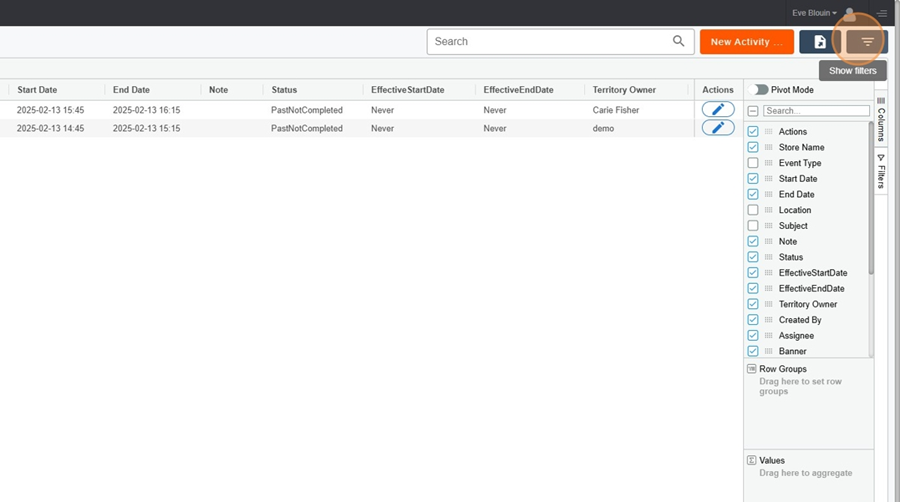
Activity screen > Show or hide columns
Click on the boxes located to the left of the categories to select (show) or deselect (hide) a column.
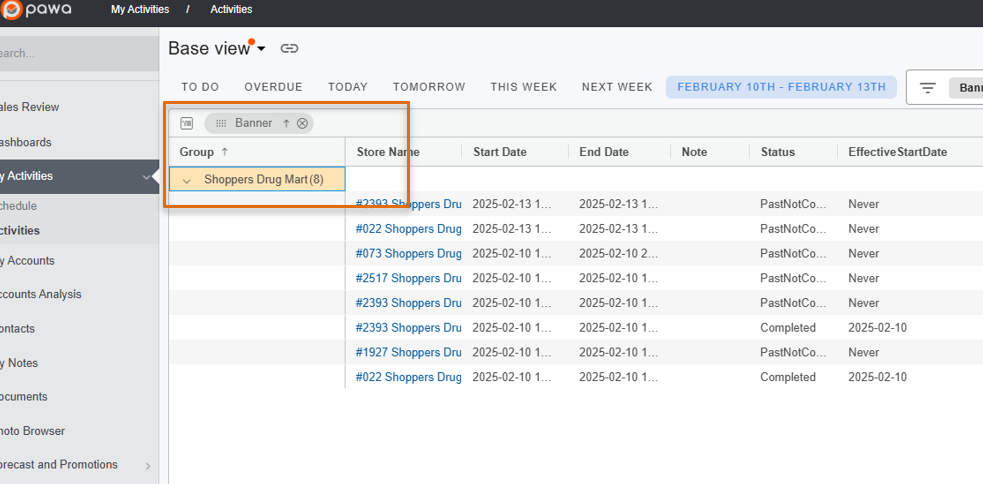
Activity Screen > Group calls
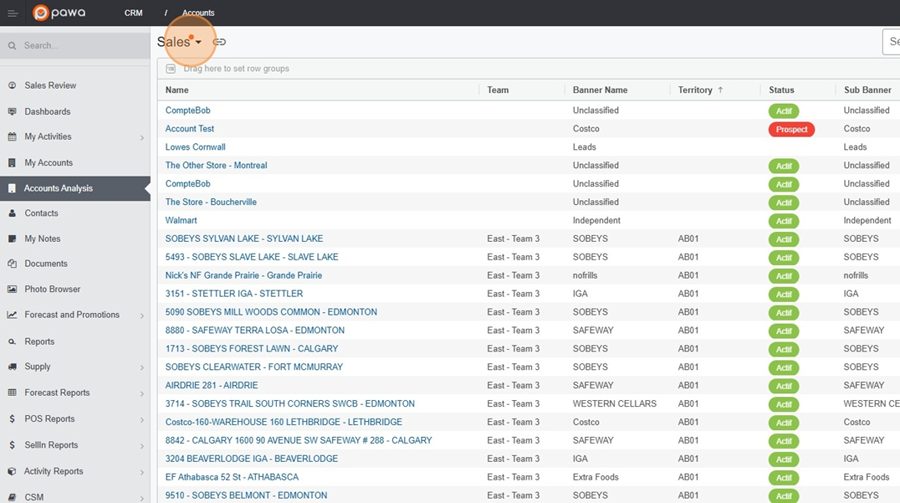
To group calls by a specific category, simply click on the desired category and drag it to the « Row Groups » area while holding the mouse button down.
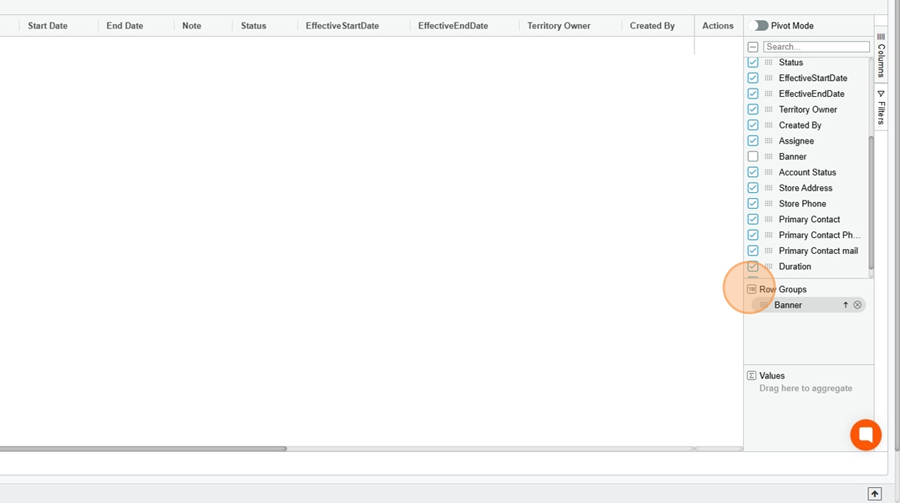
You will then be able to view events based on the selected category, which will appear at the top left.
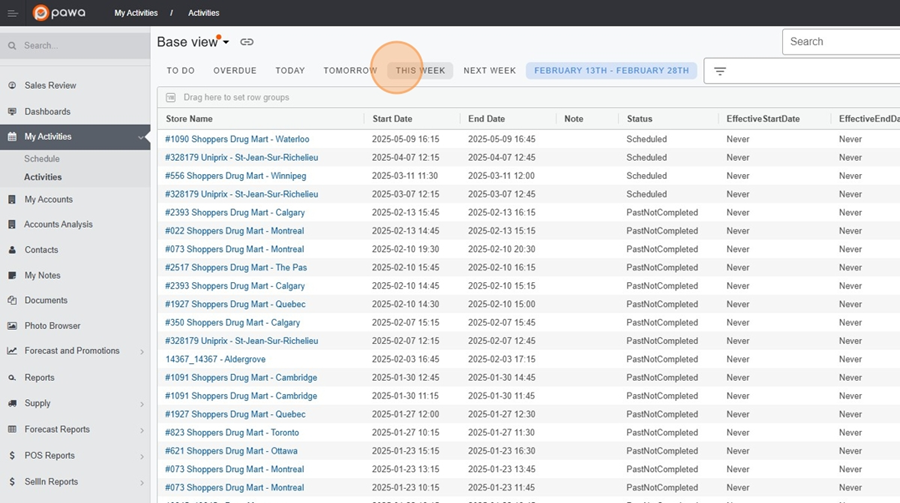
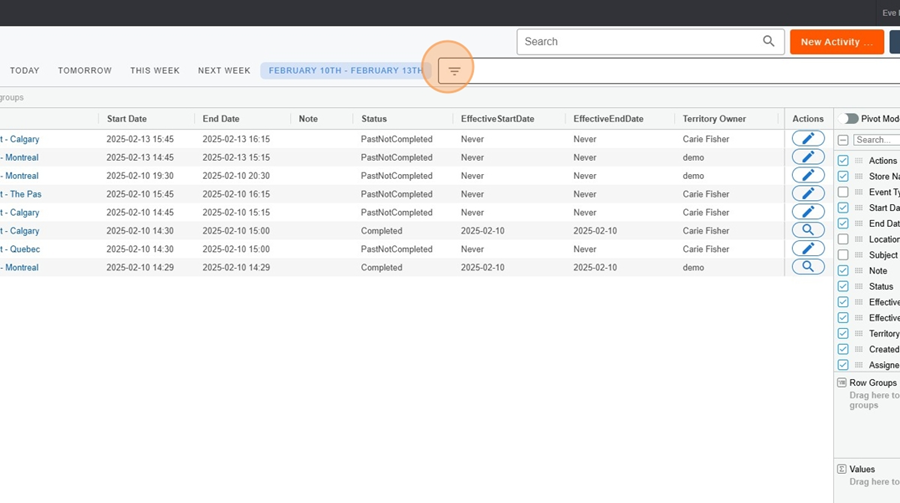
The filter option (icon at the top, to the right of the export diskette) allows filters to be displayed in order to view events for a specific time period. For example, it is possible to display only events from today, this week, next week, etc.
Here are the different filter display options:
To do: Scheduled calls in the past or future calls that have not yet been completed
Overdue: Scheduled calls in the past that have not been completed
Today: Scheduled calls for the same day
Tomorrow: Scheduled calls for the next day
This week: Scheduled calls for this week
Next week: Scheduled calls for next week
Month/Day-Month/Day: Scheduled calls within a custom time range
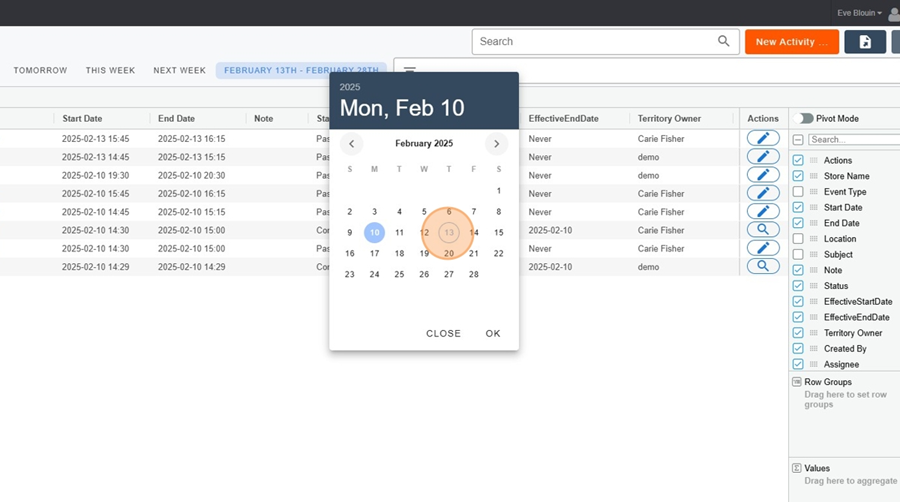
Activity screen > View events for a specific time period
Click on the filter icon at the top right. Options will then appear at the top of the screen.
Select the desired time period (for example, this week).
It is also possible to select specific dates by clicking on the month and day at the top of the screen, to display a custom time period.
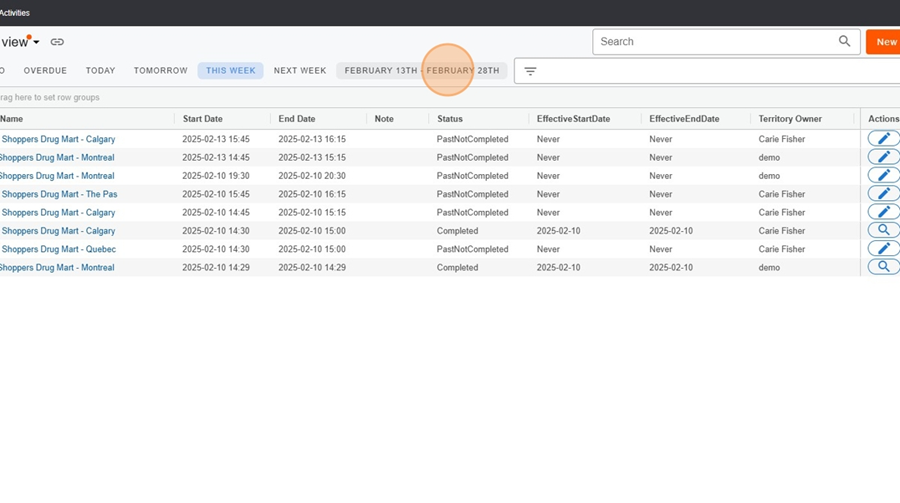
Then select a start and end date in the calendar that will appear.
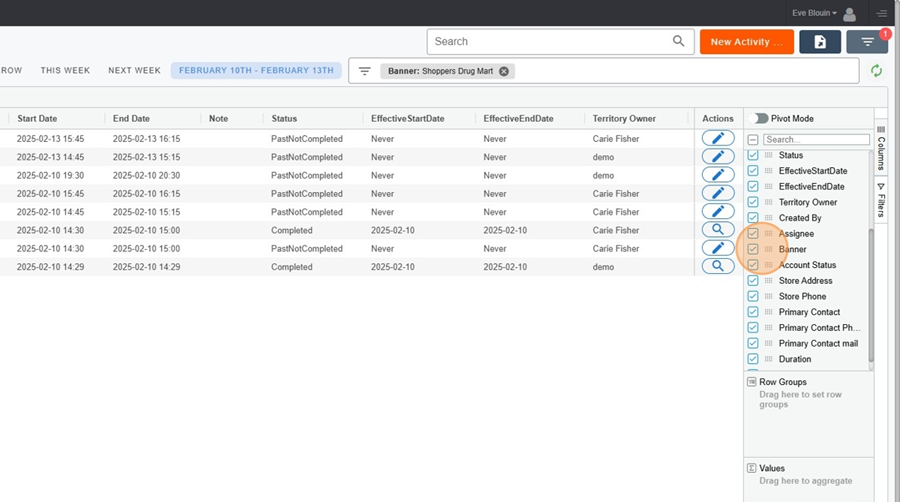
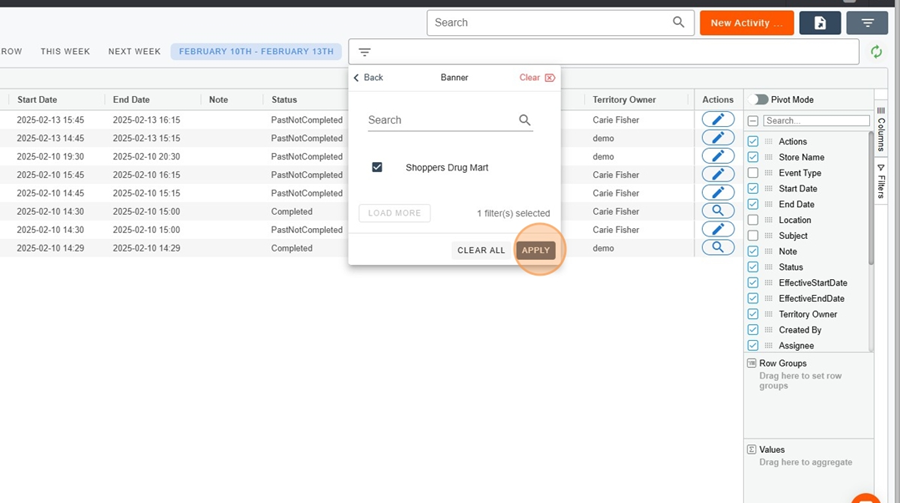
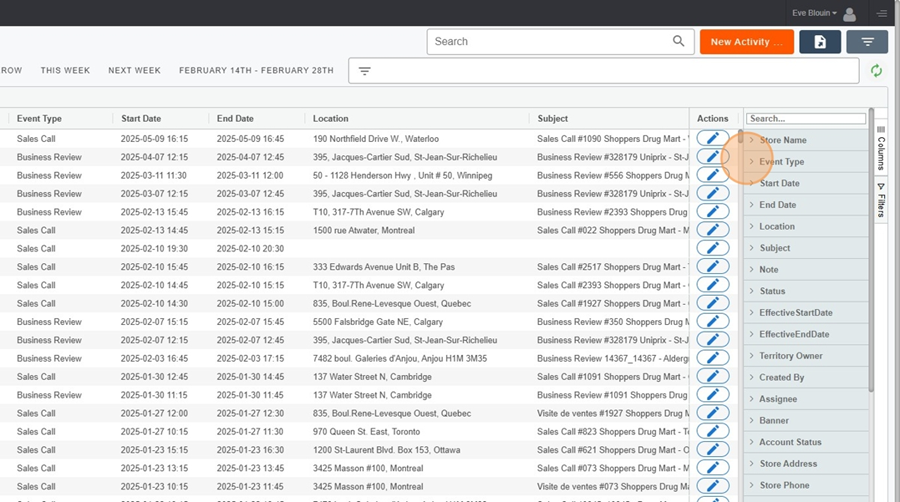
The filter option located at the top right of the date allows you to filter events by different categories.
Activities screen > Filter by categories
Click on the filtering icon at the top of the screen, to the right of the date.
Select an option from the dropdown menu (for example, Banner).
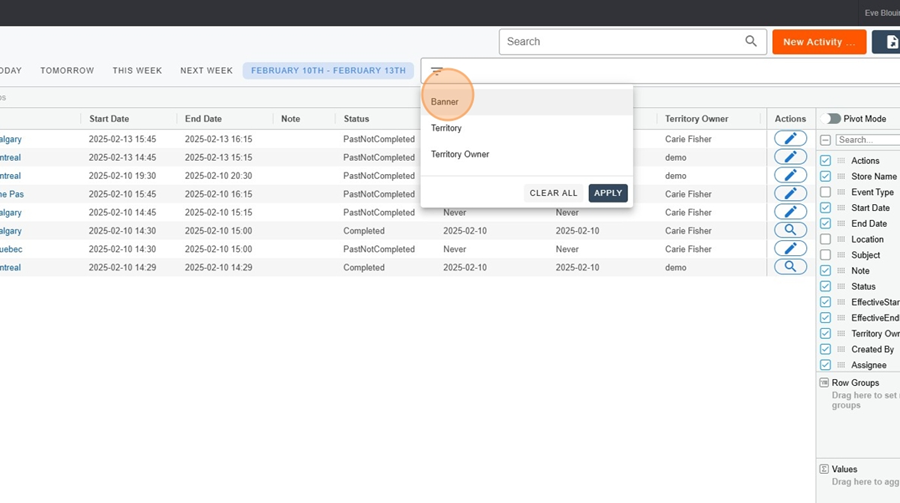
Click on Apply.
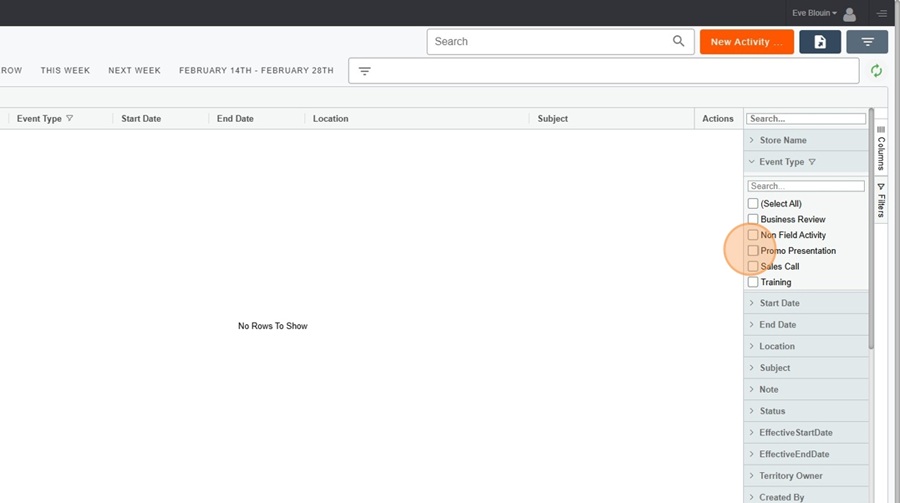
The filter option on the far right once again allows filtering the view, this time based on columns and their subsections.
Activities Screen > Filter by categories
For example, suppose we want to filter by a specific type of event.
Click on the Filters option, on the right of the view.
Click on the column you want to display.
Select the subcategory you want to display.
Save the view if needed.
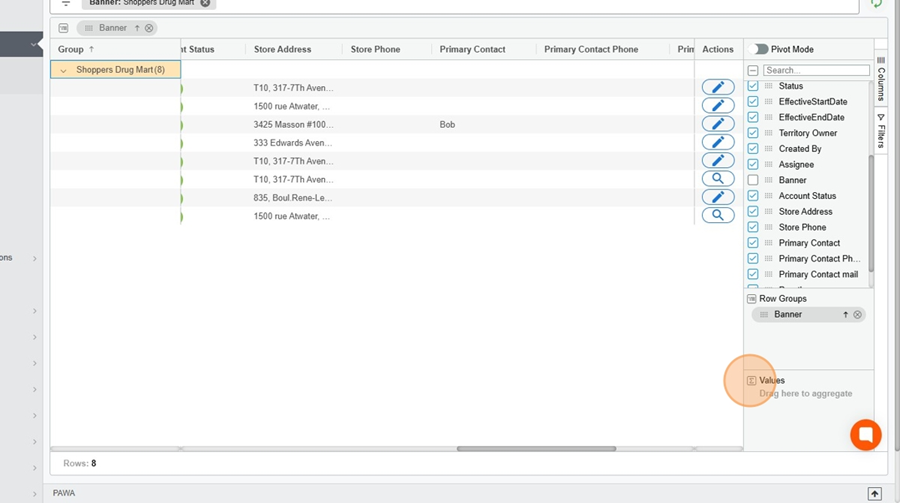
The Values option at the bottom right allows you to view the total time sum of all completed calls.
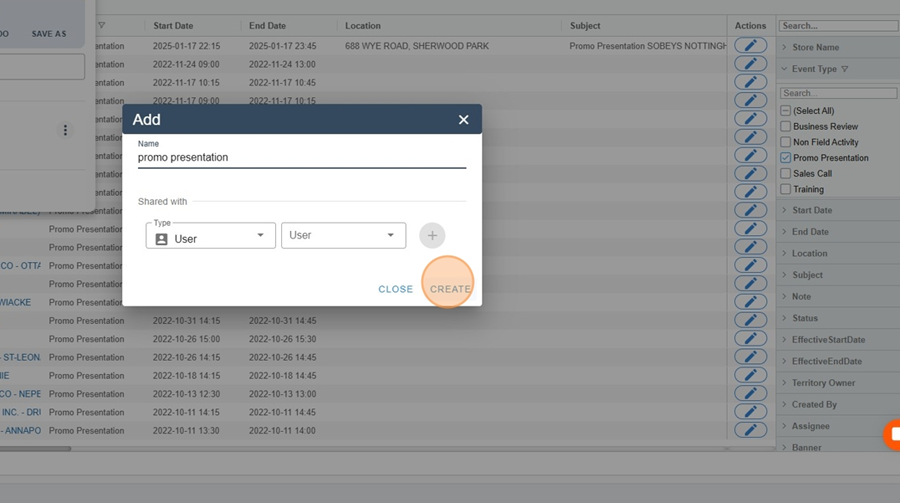
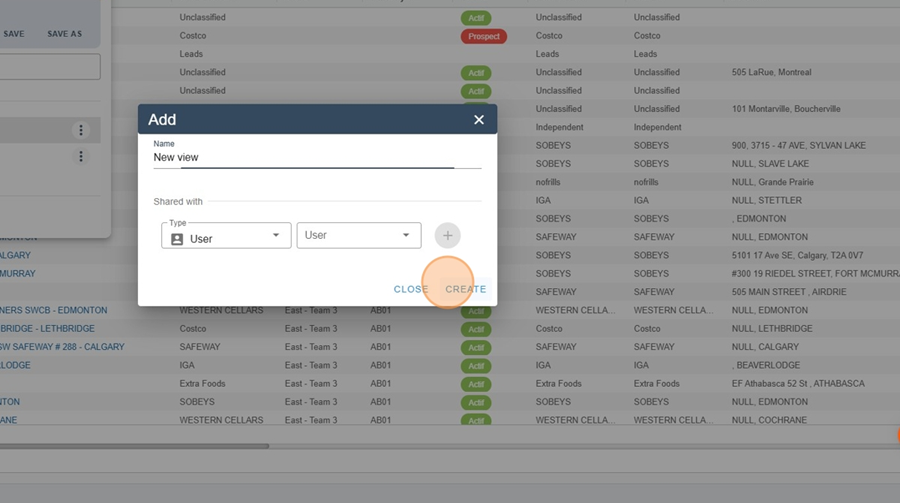
When you are satisfied with the view, it is important to save it.
Click on the title at the top left.
Click on Save to save the changes.
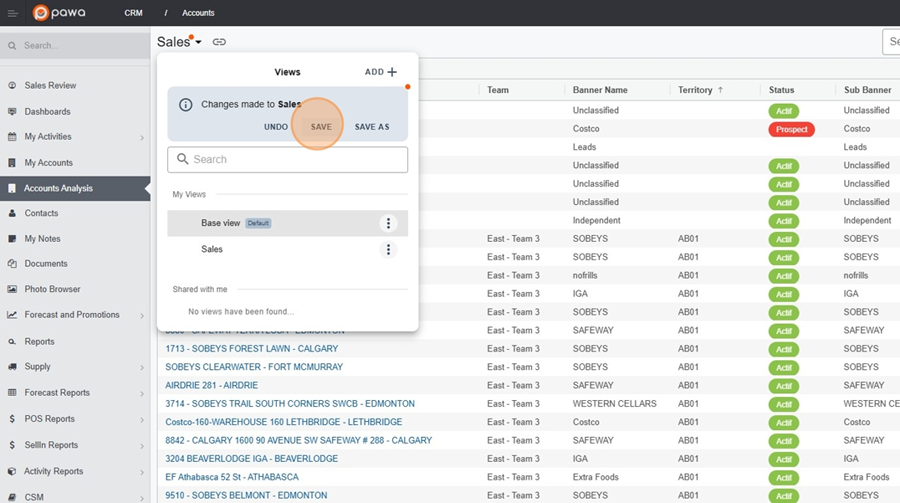
If you are working on a new view, click on Save As.
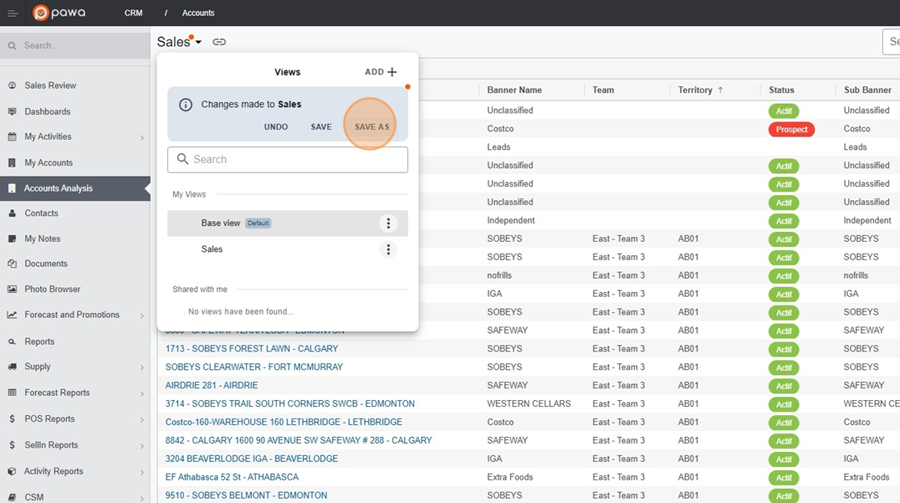
You can then name the view however you want by entering the title in the writing bar, and clicking on Create.
To search for an event, click in the search bar at the top right of the screen and write the event you are looking for.
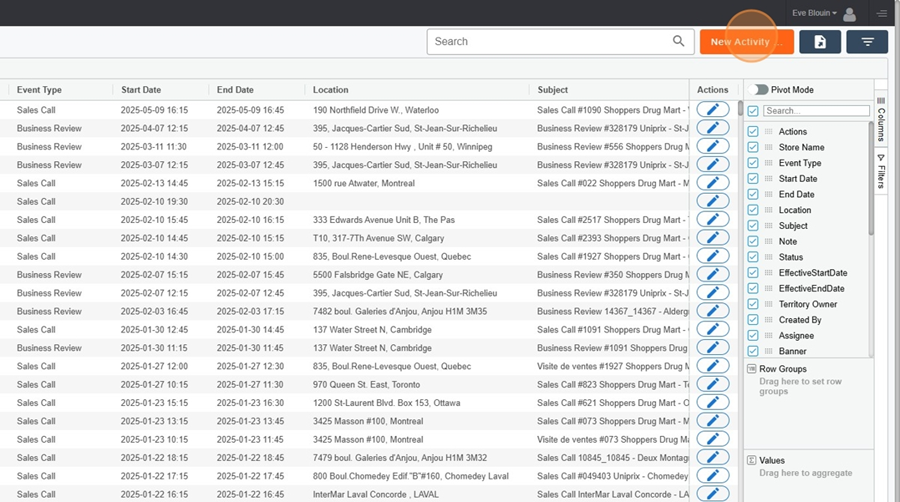
It is possible to create a new event directly in the activities screen.
Activities Screen > Create an Event
Click on the orange rectangle titled New Activity at the top right.
A menu like this will appear.
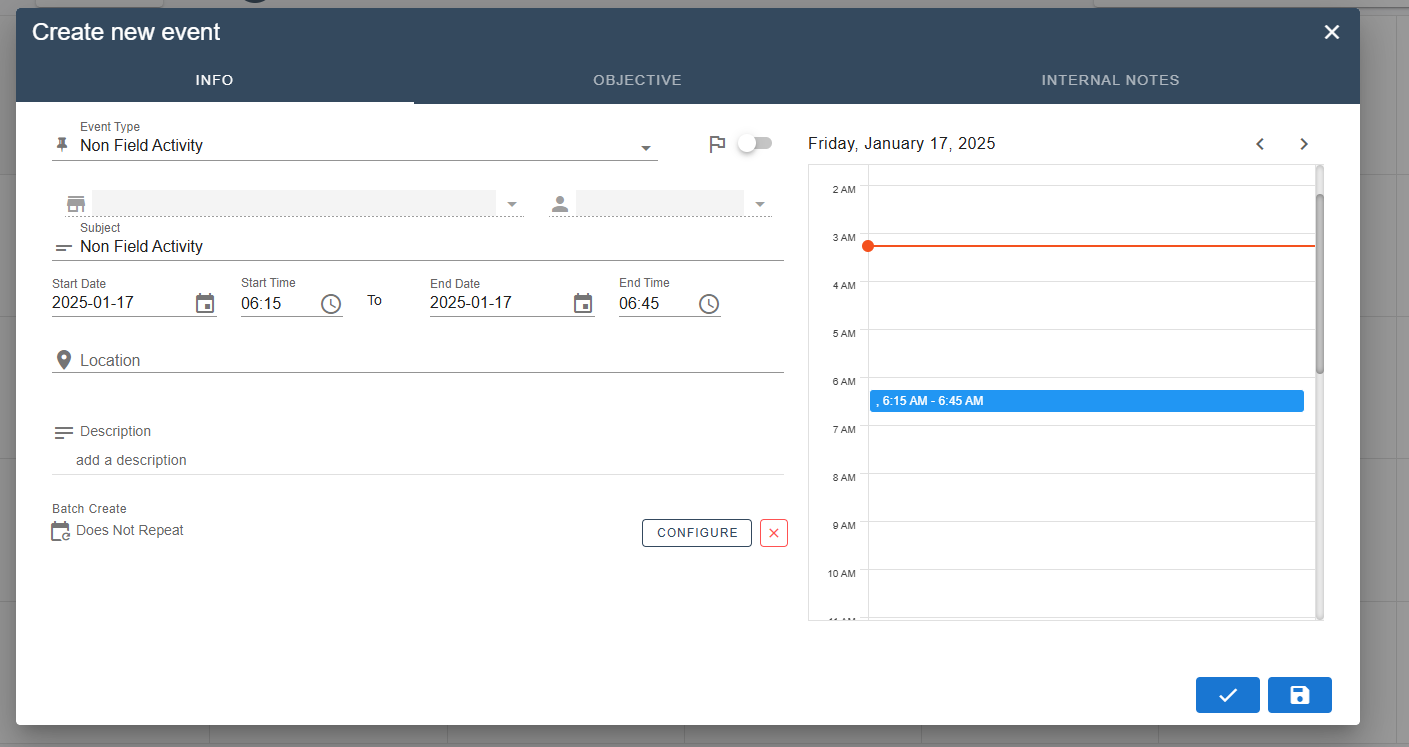
The dropdown menu allows you to configure the event you want to create according to several parameters.
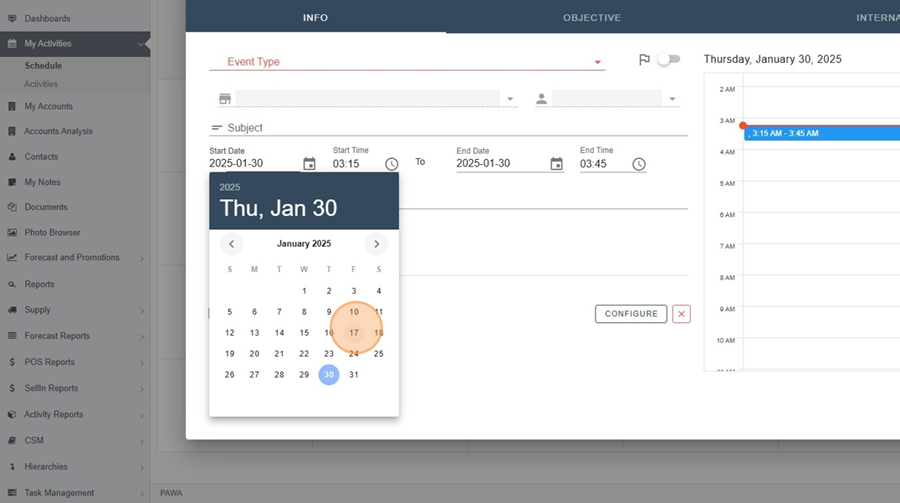
Create an event > Change the date
To change the start and end date of the event, click on the calendar icon.
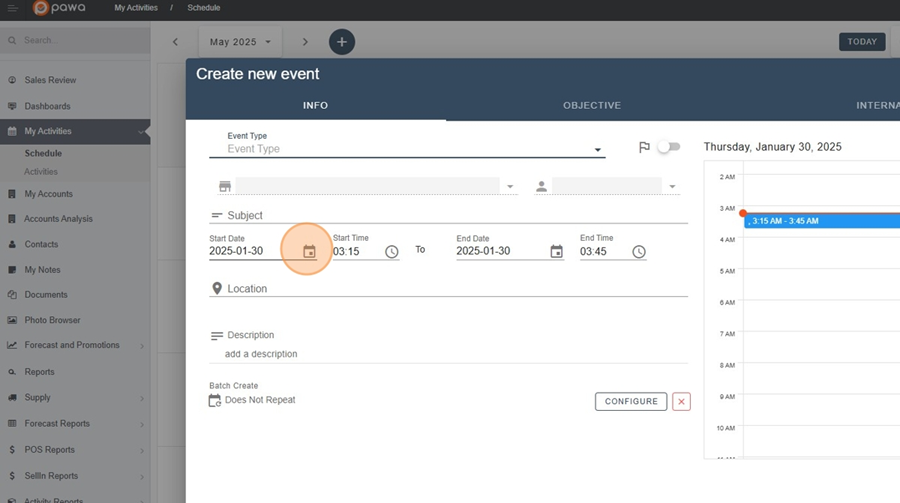
Select the desired date.
Create an event > Change the time
To change the start and end time of the event, you can select the desired time by clicking on the clock icon.
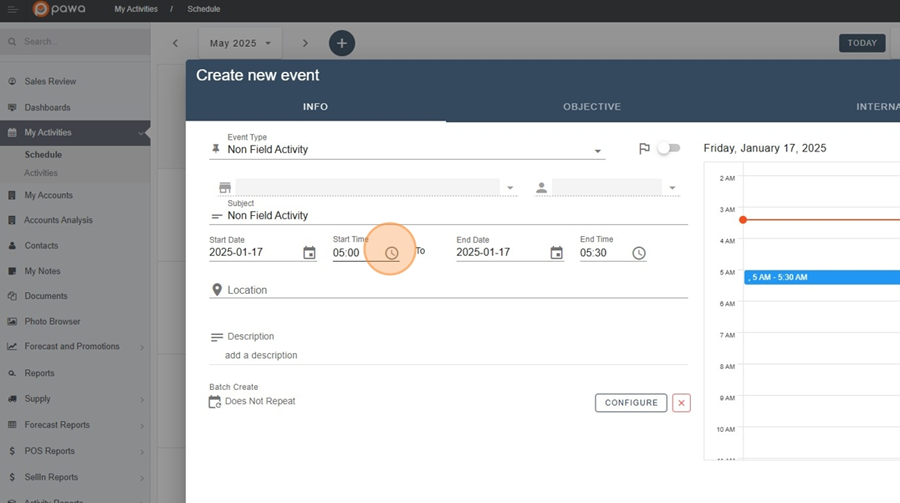
Then select the desired time.

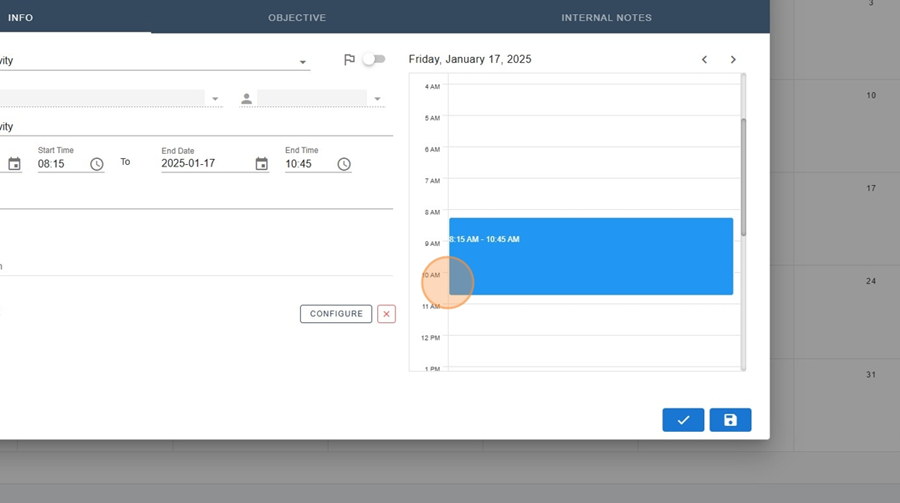
It is also possible to block the time slot by holding down your cursor from the start time of the event to the end time of the event, directly in the schedule located on the right side of the dropdown menu.
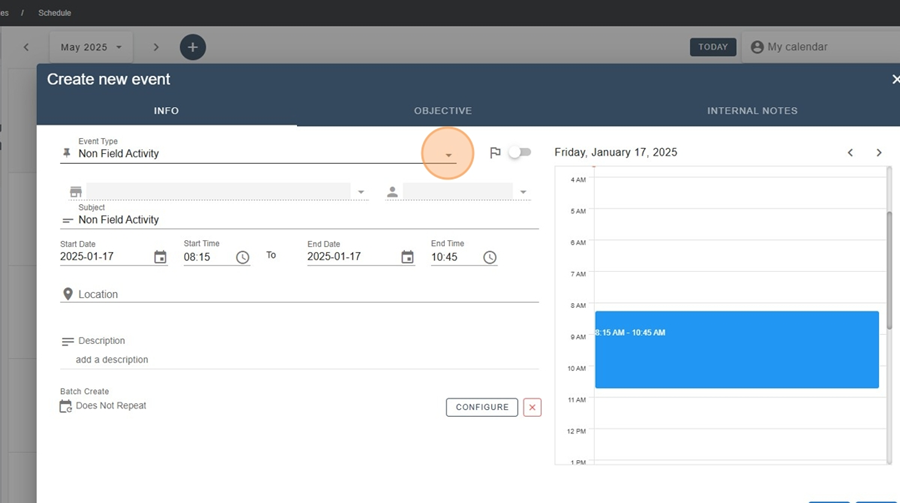
Create an event > Select the type of event
To select the desired event type, click on the arrow to the right of the «Event Type» section and select the appropriate option from the dropdown menu.
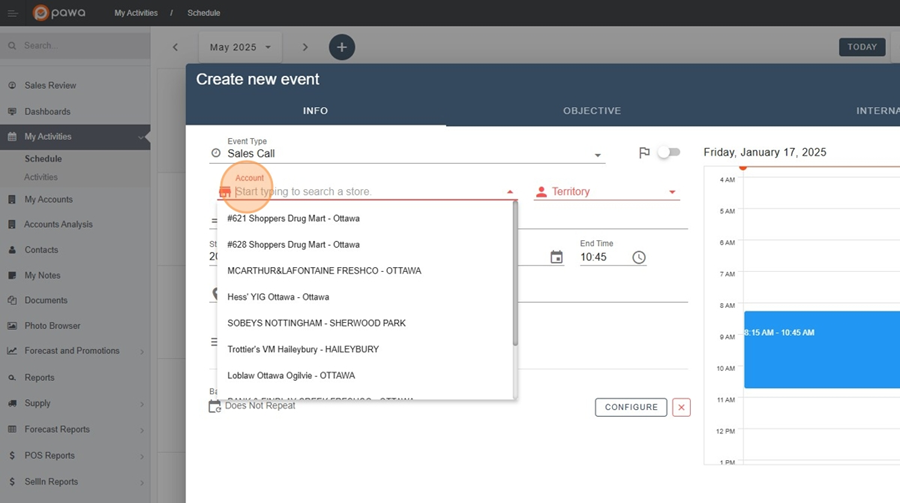
Create an event > Choose the location
To choose the event location, click in the search bar under the «Account» section and type in the location where the event will take place.
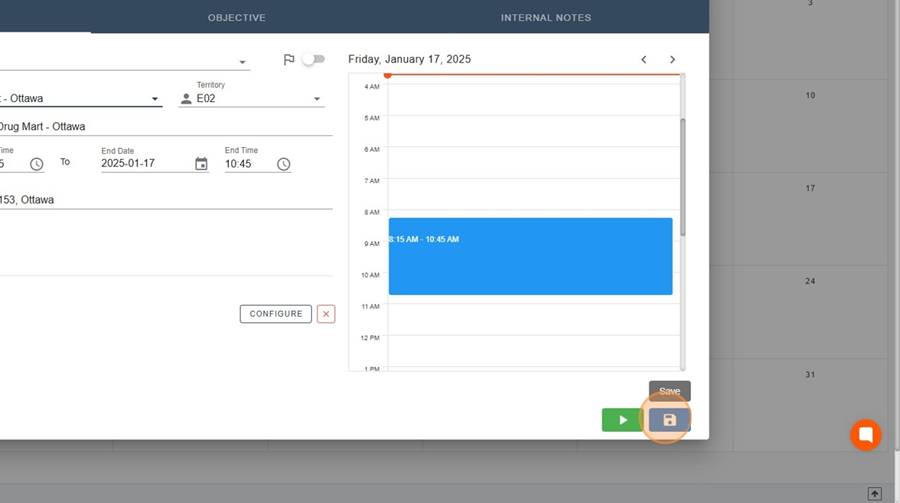
To save all the changes made to the event, click on the floppy disk icon located at the bottom right of the menu.
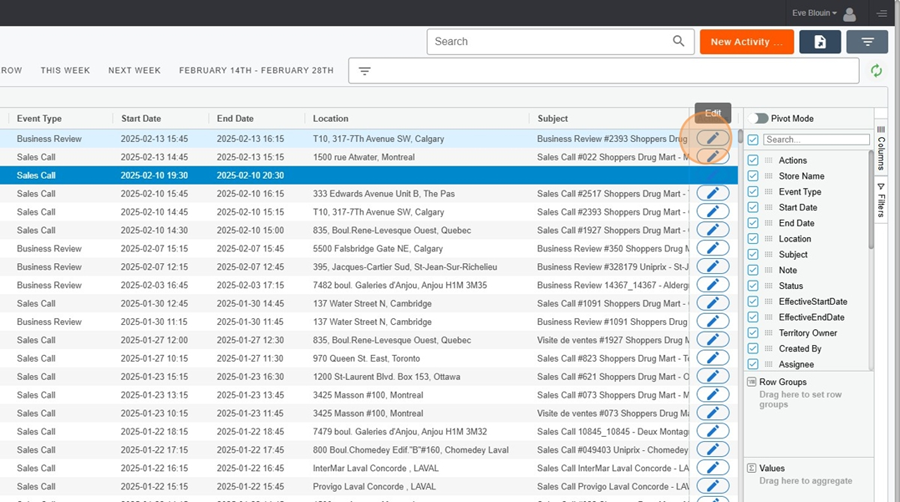
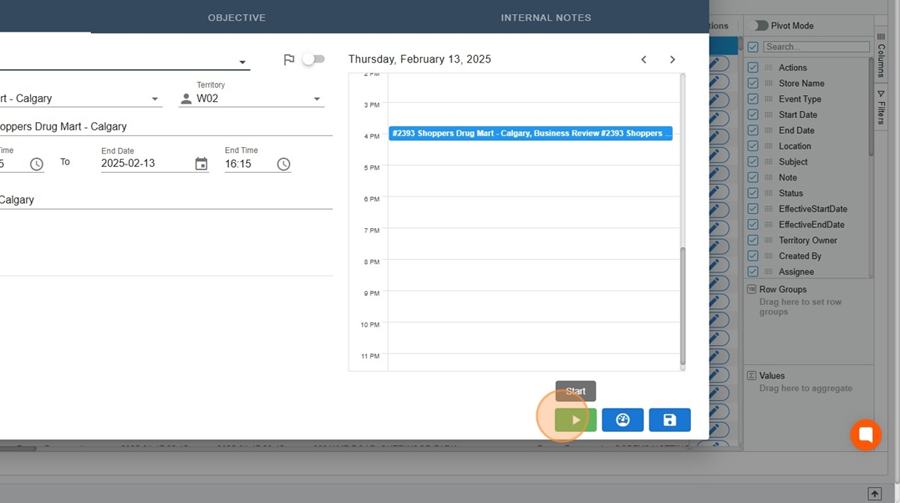
To begin a visit assigned to you, simply click on the pencil icon at the end of the chosen event.
Then click on the green arrow, at the bottom right, to start the visit.
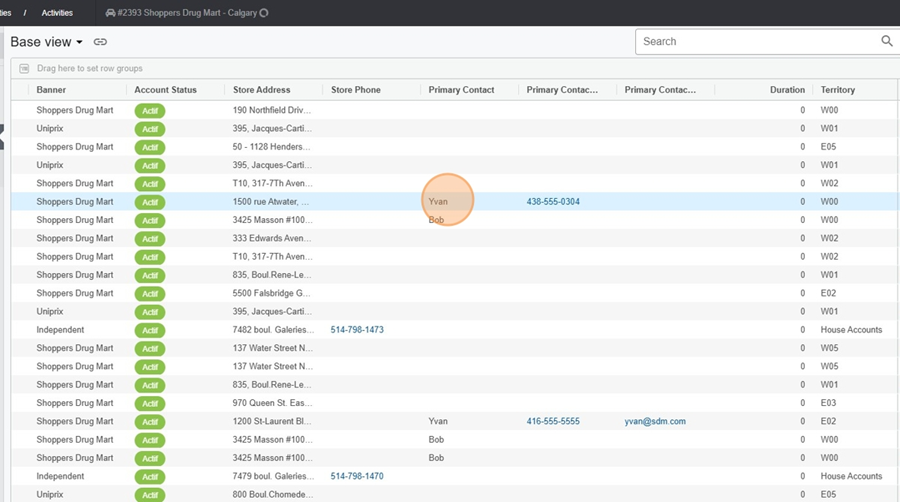
You can view or add the main contact information for an account.
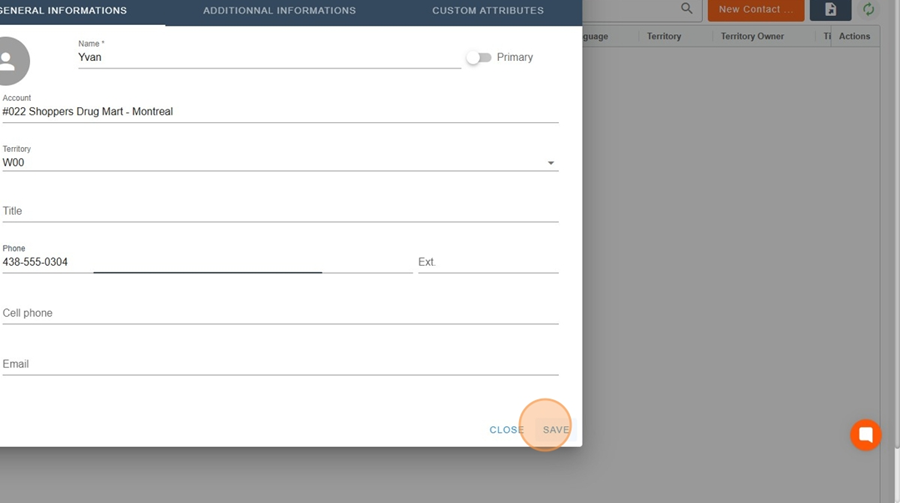
Activities screen > Create a contact
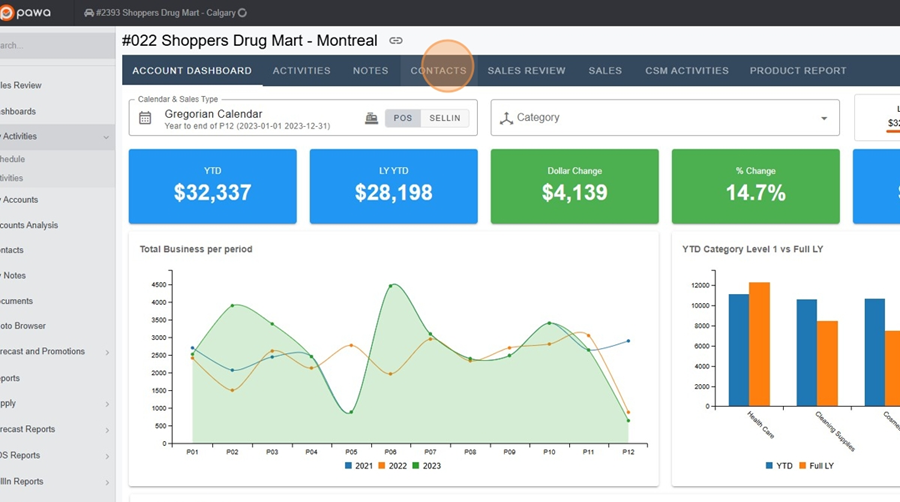
Click on the account to which you want to add a contact.
Click on the contacts option at the top of the screen that will appear.
Click on the orange rectangle New Contact, at the top right of the screen.
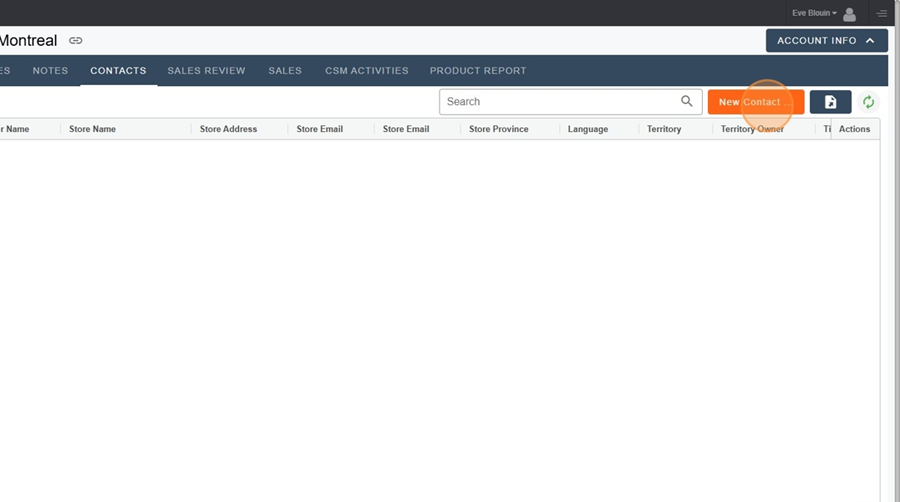
Fill in the contact information in the menu that will appear and click Save, at the bottom right, once completed.


Here we can see the contact that appeared in the activities view. By clicking on the phone number or email address if available, you can directly write an email or call the contact.
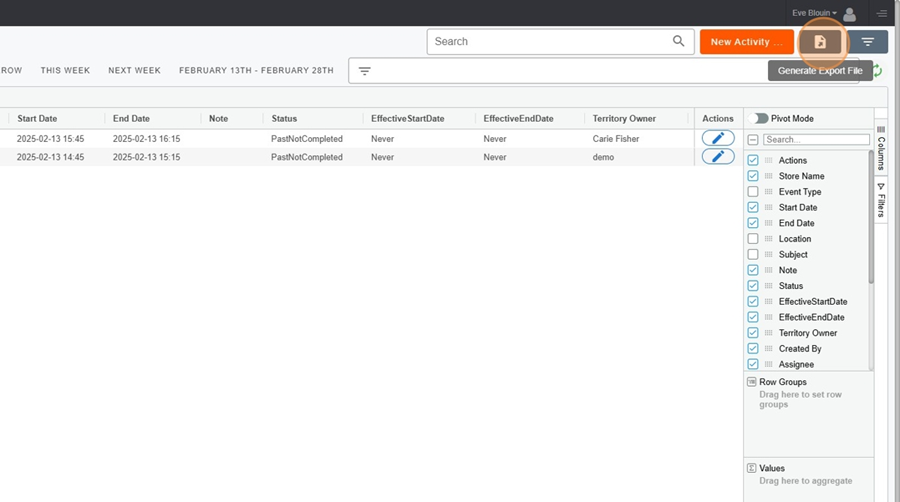
It is possible to export the results to an Excel file. Simply click on the floppy disk icon to the right of the orange rectangle New Activity.