Let’s take the example of the time frame of any measurement.
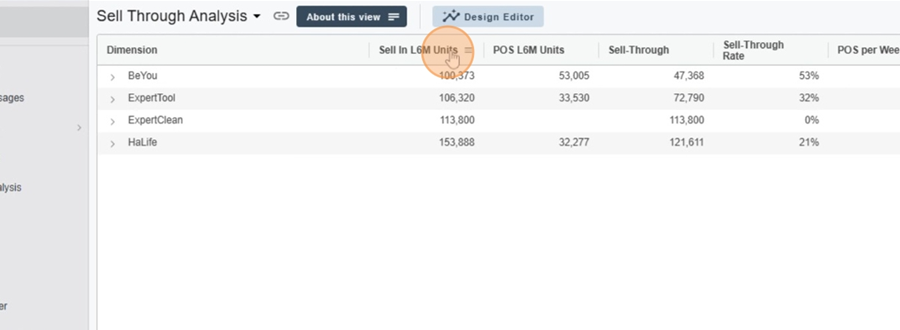
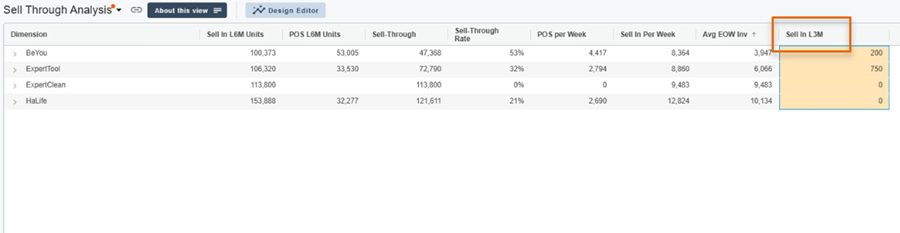
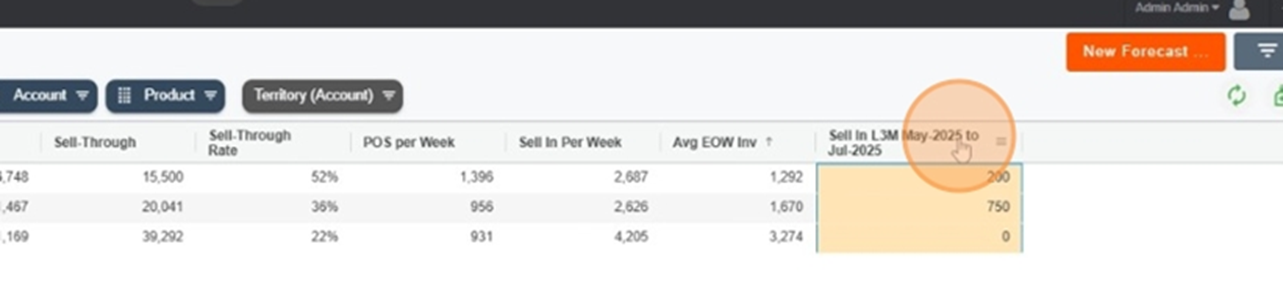
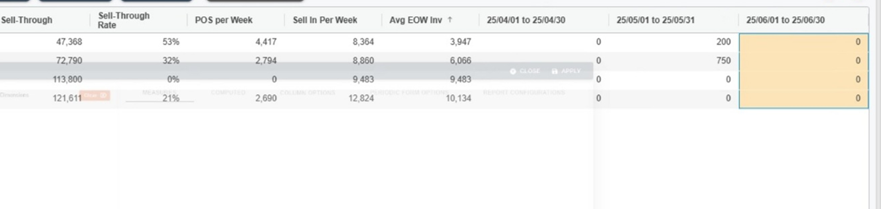
In the report, we see here a column showing the Sell In of the last 6 months. To change the time range, just click on the design editor icon
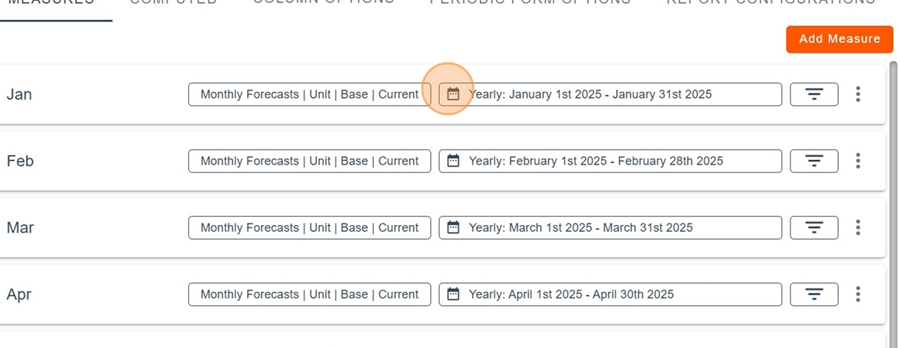
Start by clicking the calendar icon to set up the time frame
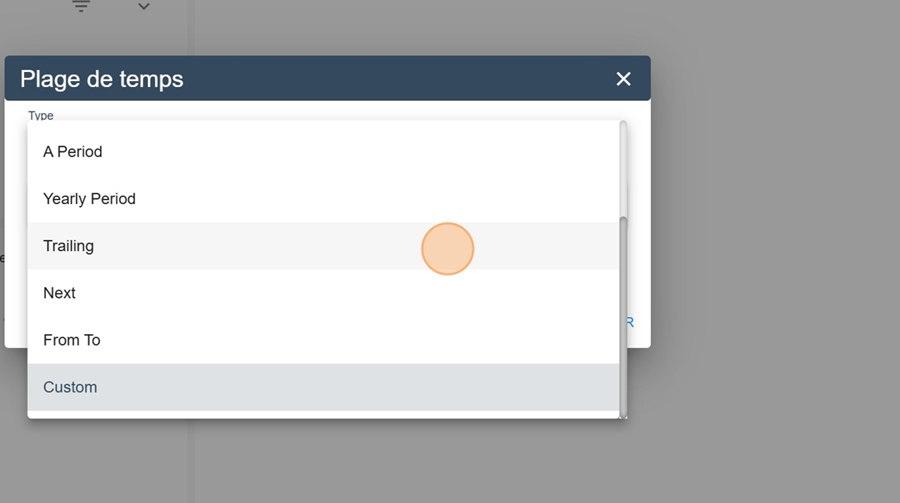
The dropdown menu offers us a bunch of Time Frame Types. Pick the one you want (see below to learn more about timeframe types). For example, here we select Trailing to see past data.

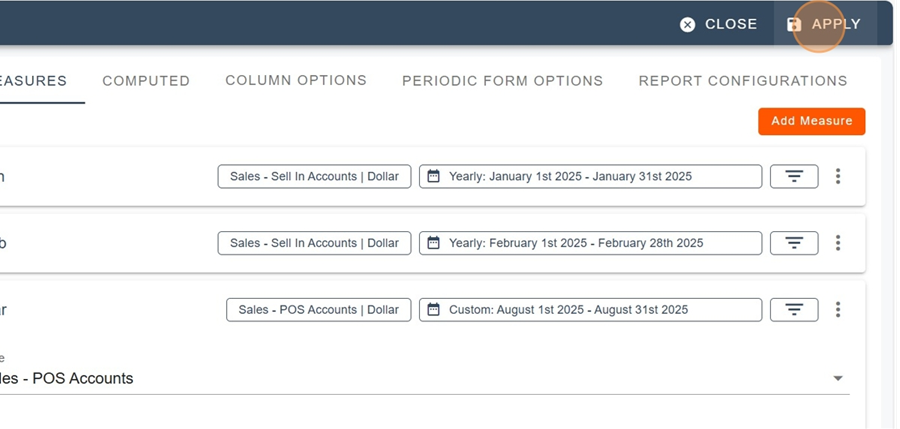
When the setup is done, click the floppy disk Apply, at the top right
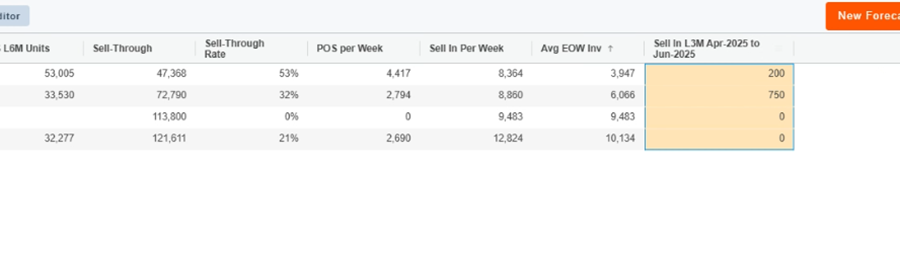
So here you can see the column showing the Sell-In for the last 3 months, as set up earlier
You can also, when naming the measure, set how the time range displays by putting this in curly braces:
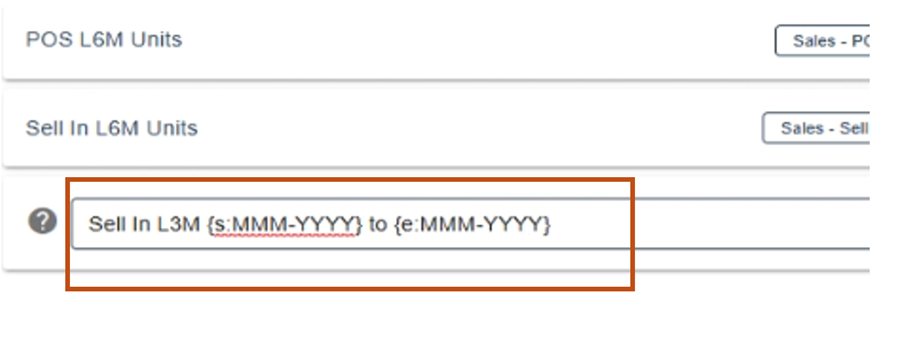
So, when you look at the report, you'll be able to easily check out the Sell In (in this example) within the last three months (here, from April to June)
It’s also interesting to see that this time frame changes over time. For example, if we adjust the reference date by clicking the calendar icon on the right;
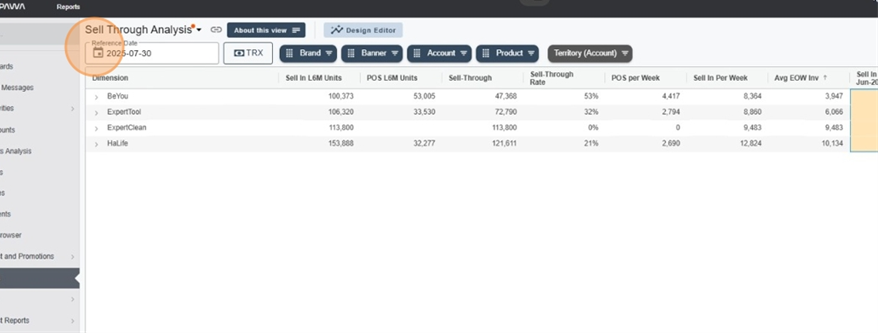
The time frame will update automatically
It's important to pick the right kind of Time Frame when you're setting it up. Choosing the right type will give you a simple, quick, and effective analysis.
This type lets you view data from the first of January of the current year up to the report's reference date.
This type lets you view data from the first of January of the current year up to the end of a period. You can choose to include the current period or not.
This type lets you view data from the current month up to the report's reference date.
The period is just a specific month.
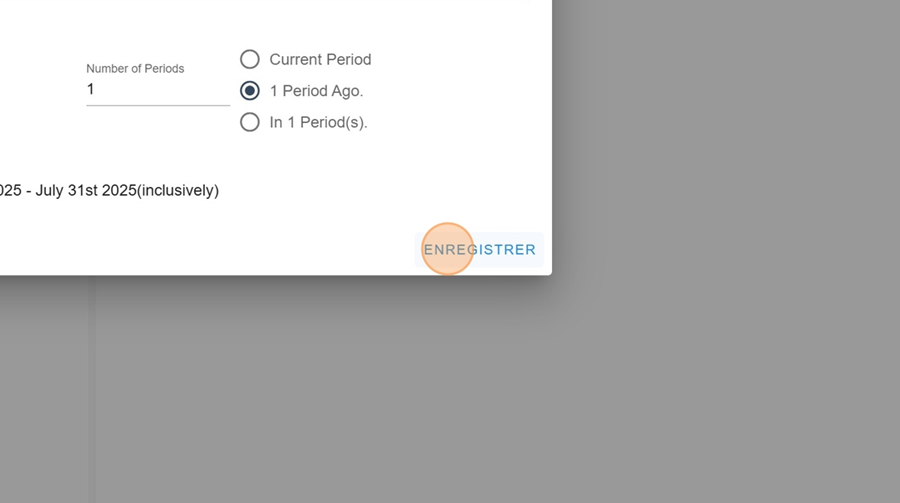
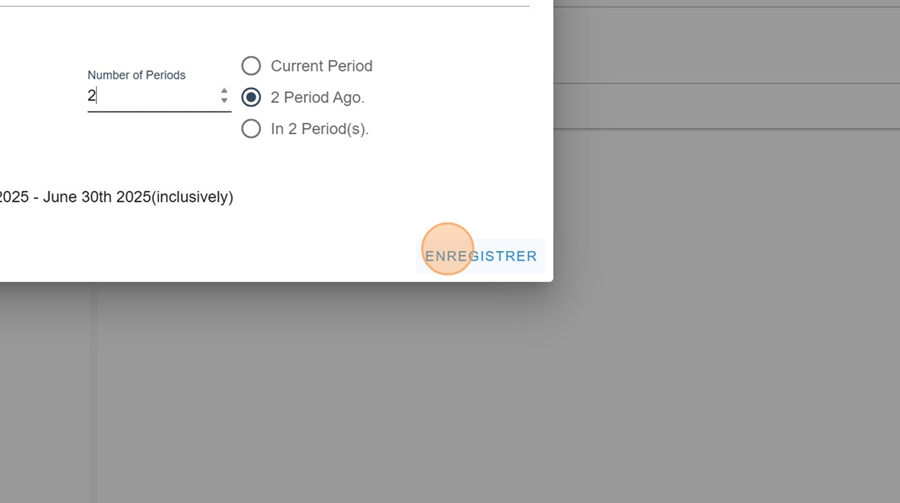
You can pick the current period, the previous period, or the next period
You can also enter the number of periods you want
For example, if you want to see the last 3 periods, just enter 3 in the space made for it and click save
It might be useful later to duplicate the measure
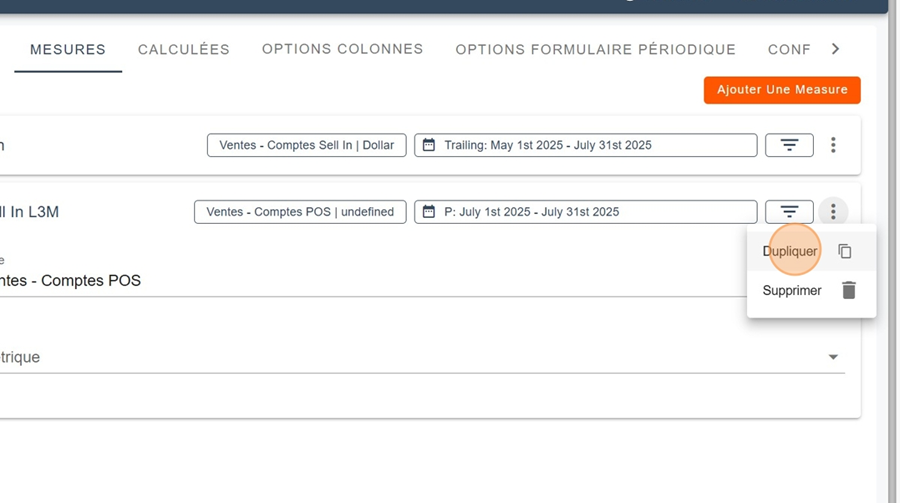
After that, you can change the number of periods to get a detailed view of the last few months. Don’t forget to click save.
So, you can check out the periods by month later on (like in the example below)
This kind of Time Frame is handy, for example, if you want to check out the sales for every month in the current year, in columns.
You can also make comparisons between a month in this year and the same month last year, for example.
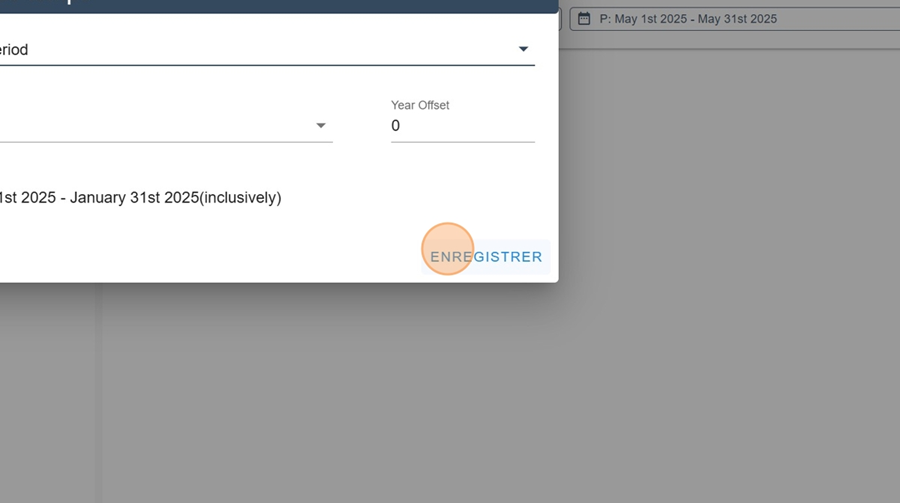
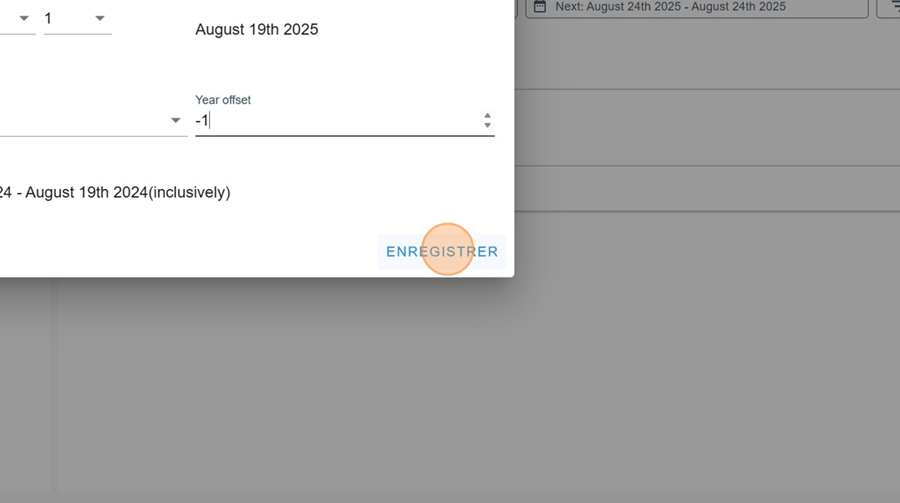
First, pick the month you want for this year (Year Offset needs to be 0). Hit save
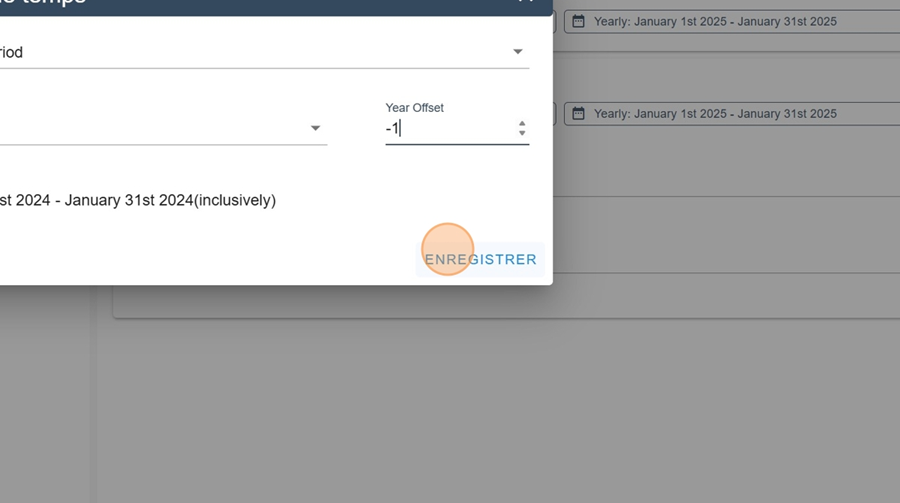
Duplicate the measure and do the same step, but this time set -1 for Year Offset. Hit save
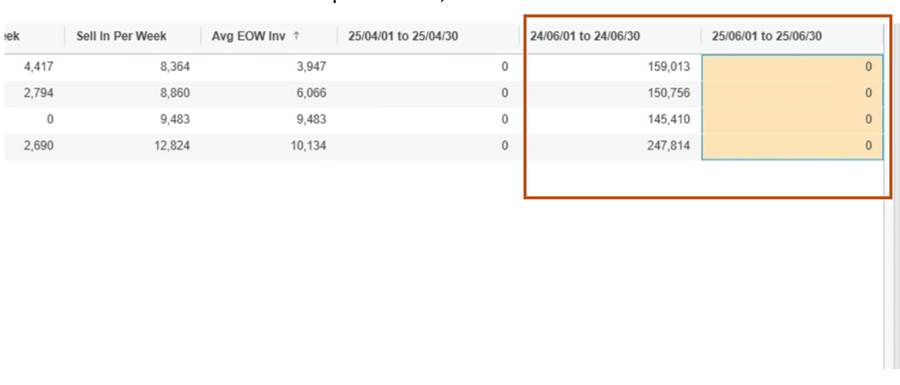
Then click on apply at the top right to compare this year's sales for the month with last year's, using the columns
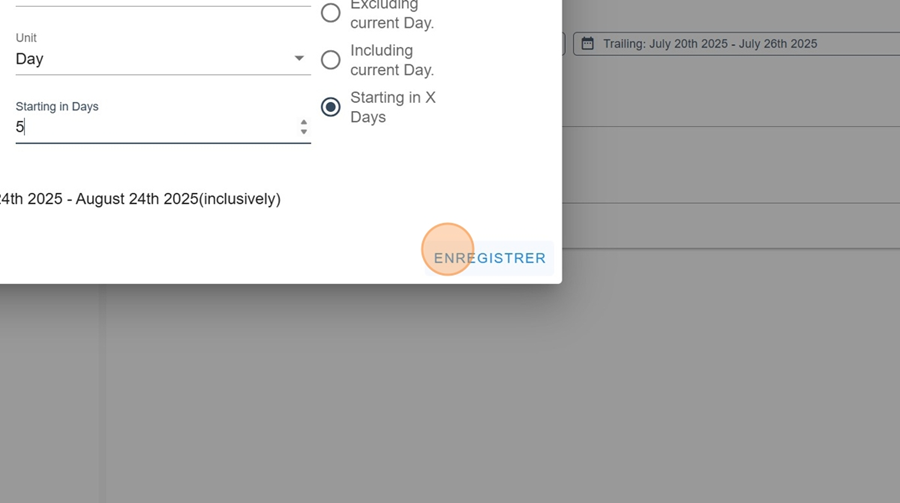
Trailing lets you check out relative past data, whether it's the last days, weeks, periods, years, etc.
First, pick the unit (day, week, period, year, etc.)
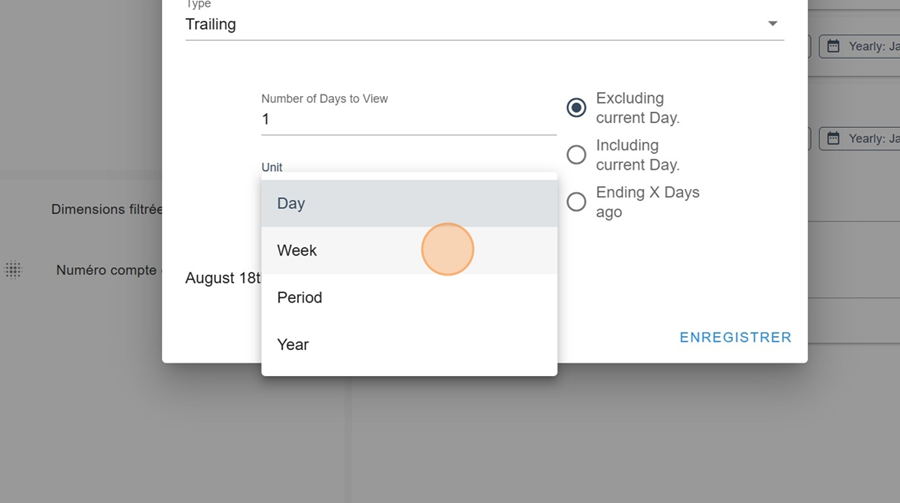
Then you can enter the number of units you want to see (day, week, period, etc.)
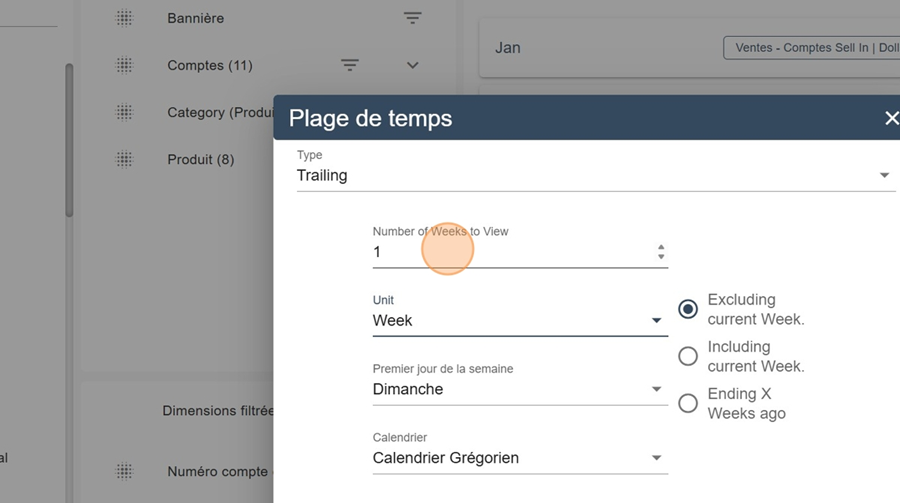
You can also choose to include or exclude the current unit (in this case, the week)
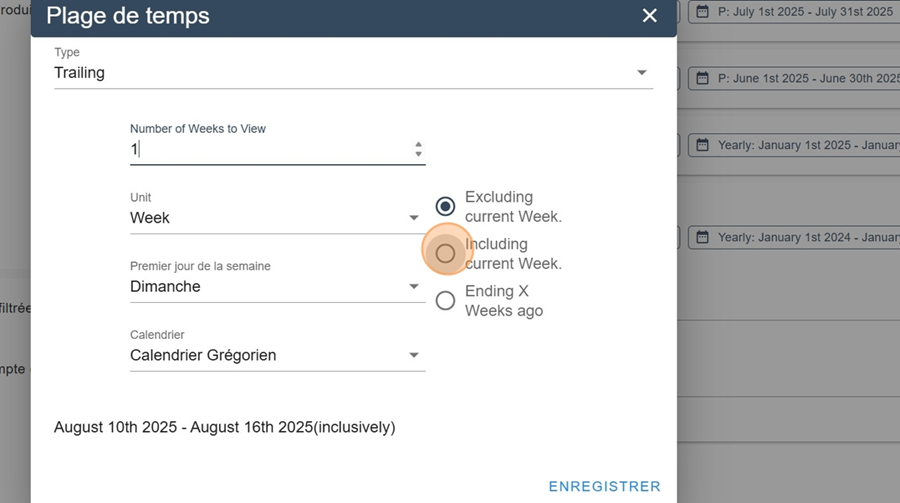

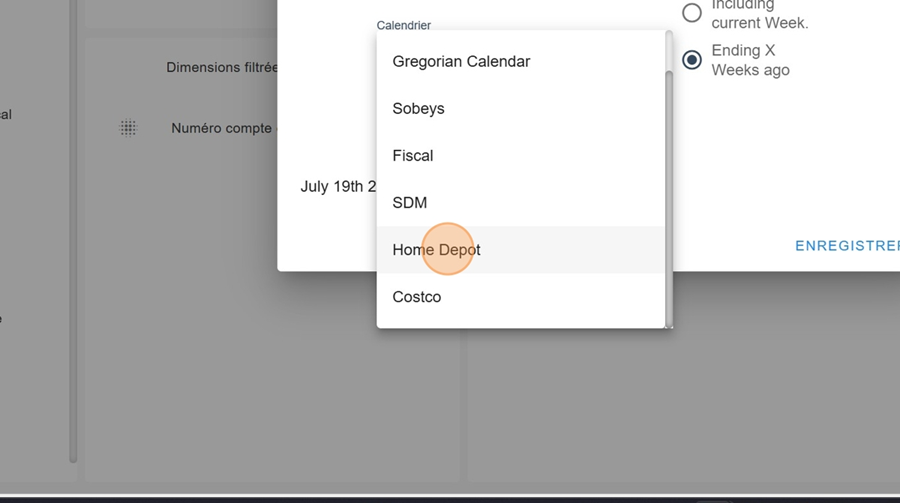
You can also pick the calendar type. By clicking in the dropdown menu, you can choose the Gregorian calendar, the fiscal calendar, and in some cases, a company calendar
The next filter is really similar to the trailing filter, but this one lets you check out data in the future.
The setup principle is the same as for Trailing. Don’t forget to click save when the options you want are selected
From to is an advanced option that lets you do things like comparisons. Several options can be pretty interesting.
Year to Current Date
Let’s say we want to compare Year to Current Date against last year.
First, select the Last option under the From box, and choose the date you want
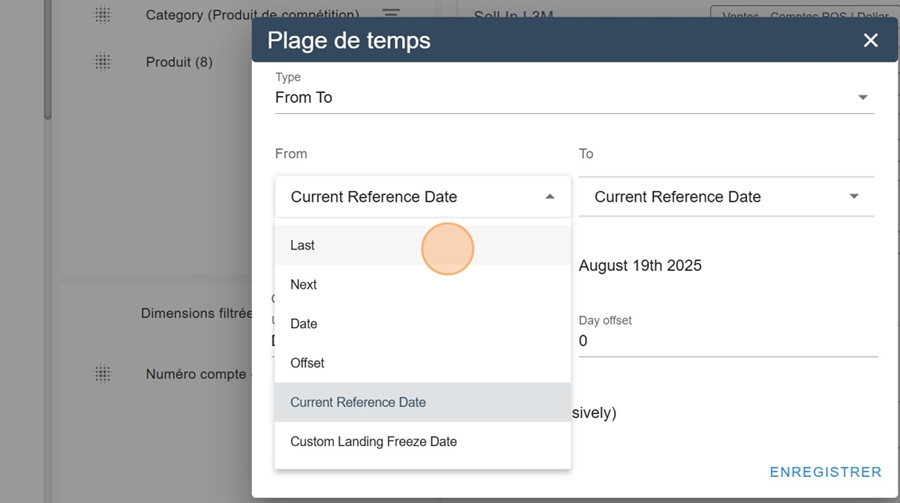
Repeat the same process by choosing the option Current Reference Date, under the To
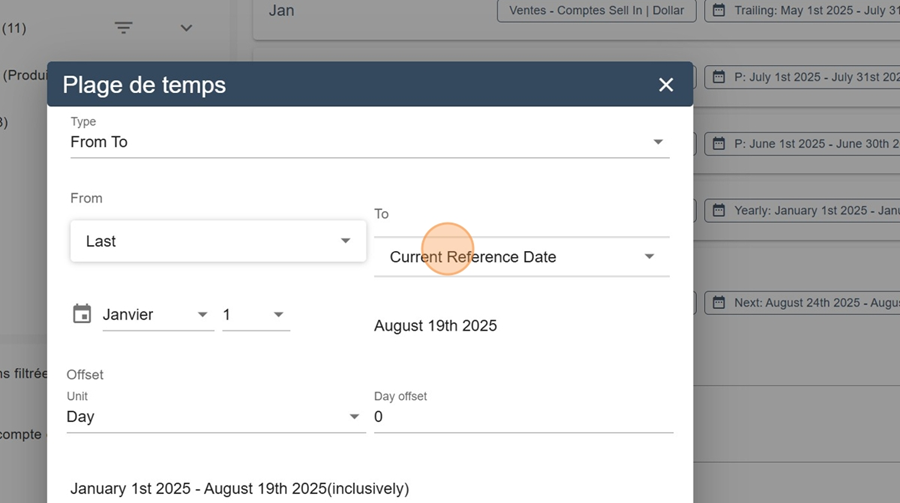
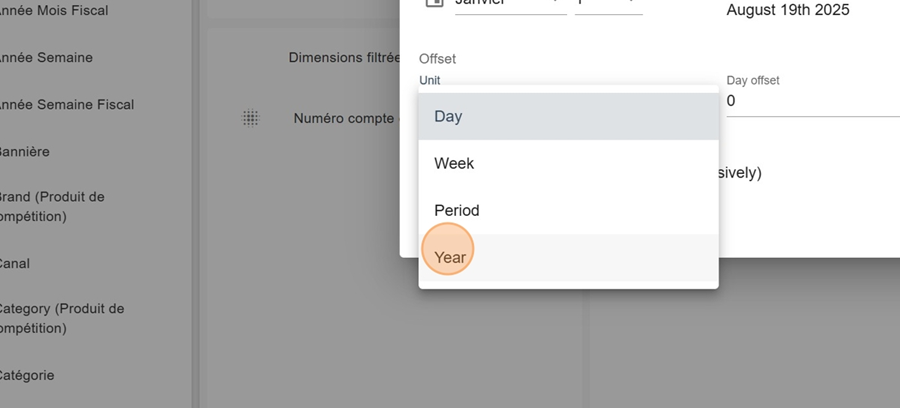
To get last year's equivalent, just repeat the same steps, but this time add an OffSet. In the example below, we pick the option Year for the Unit
Then type -1 in the Year Offset and hit save
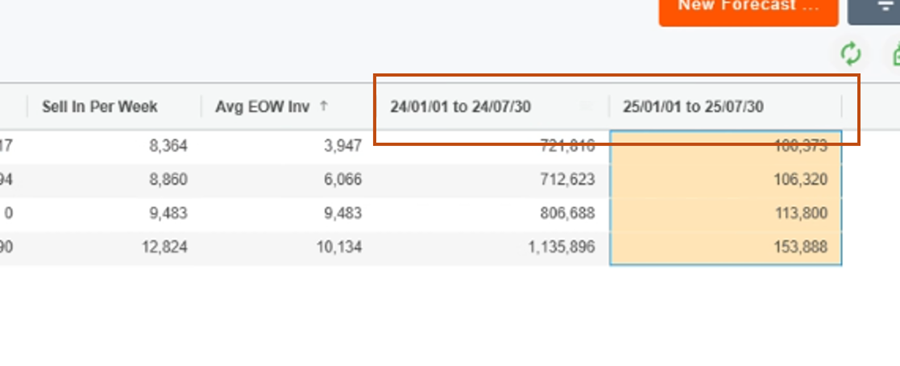
By clicking apply in the top right, you'll be able to compare these two periods
Current year analysis
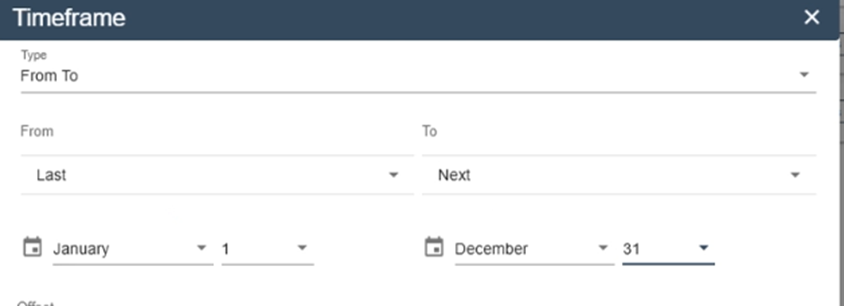
Another common example is used to analyze the current year.
To do this, choose the Last option in the From section, and January 1st on the calendar. Then choose the Next option in the To section, and December 31th on the second calendar
Next, apply the desired offset like explained in the previous steps, to compare the current year with a previous one
Fixed date
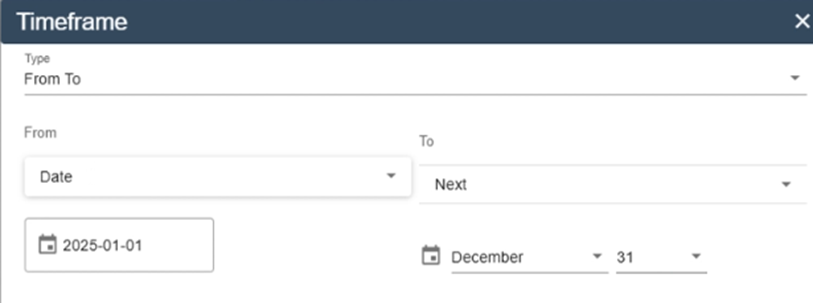
You can also pick a fixed date, up to the next December 31st. This feature isn’t recommended as much but sometimes it’s needed. Just choose the Date option under the From box, and select the date you want by clicking on the calendar
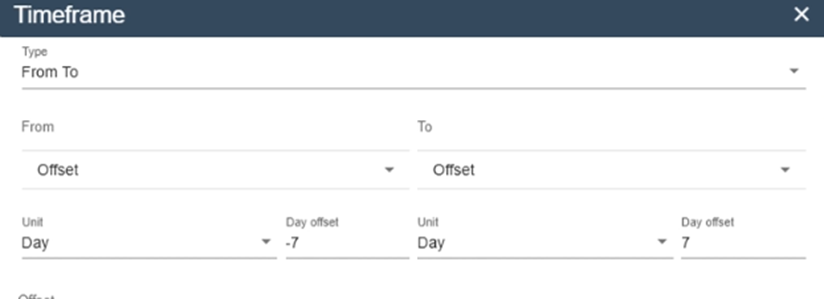
Offset
Let’s say we want to see the last 7 days versus the next 7 days. You can do this by choosing the Offset option under the From and To section and entering -7 and 7 next to the unit you want (for this, the unit’s a day). With this, you can look at the 2 weeks before and after today’s date.
Custom Landing Freeze Date
Access to the Landing Freeze Date is only for people with admin rights. As soon as the date is changed, all the reports are automatically updated. So, this option gives you some control over a date that isn’t connected to when the report is viewed or edited.